


Manual
do
Maker
.
com
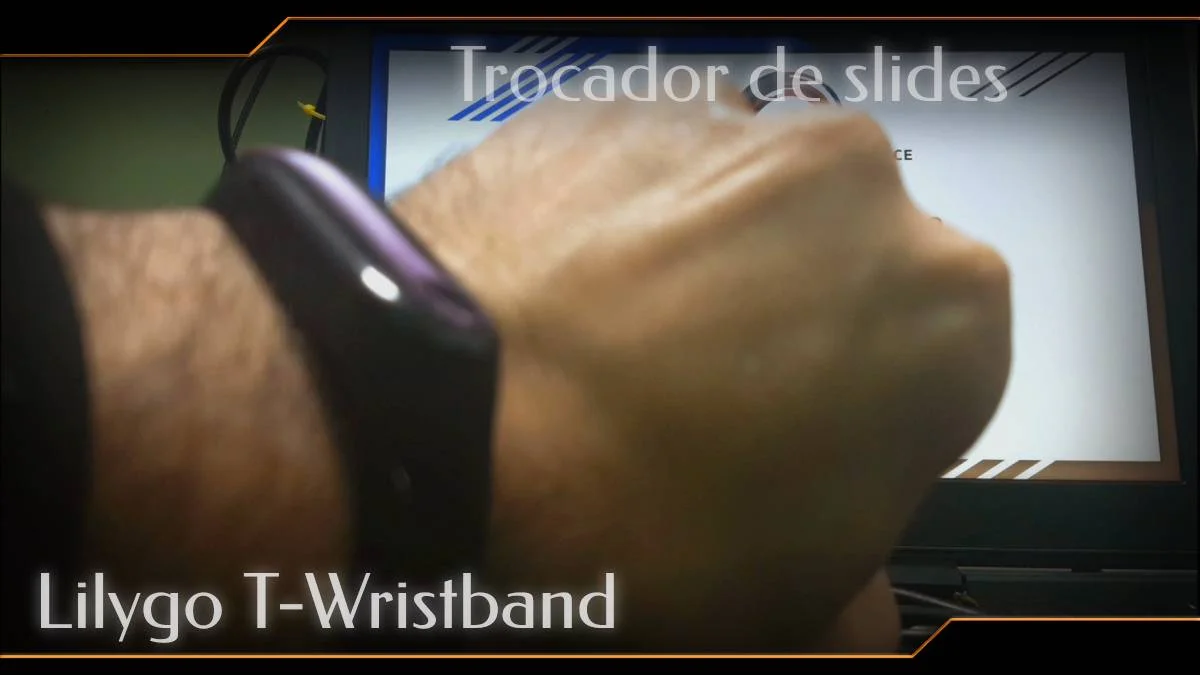
Trocador de slides com ESP32


No artigo anterior vimos um controle básico do T-Wristband. Antes de começar o hands-on, gostaria de dar uma dica que adoto e, provavelmente você já deve ter reparado: Faça as coisas por etapas. Para fazer esse trocador de slides (não me ocorreu um nome mais adequado) comecei pelo primeiro passo, que é determinar o caminho a ser percorrido. Vamos ao projeto.
Pra que um trocador de slides?
Como citei no artigo passado, esse era um objetivo para 2020, para a palestra no Arduino Day em Cuiabá, a convite da equipe do Arduino Brasil. A palestra seria "Como ter ideias para projetos com Arduino". Já estava tudo preparado, exceto o trocador de slides, que tive a ideia de fazer para não precisar me deslocar ao laptop cada vez que tivesse que trocar um slide e para não precisar ocupar alguém com isso. É prático e útil, sem dúvidas.
Determinando o projeto
Precisamos conceber o objetivo antes de tudo. Para esse artigo determinei que o ESP32 se conectaria à minha rede WiFi invés de usar o laptop como hotspot. Isso porque durante o desenvolvimento precisaria consultar alguns artigos do blog para executar determinadas funções. E aqui vai outra dica; o blog tem quase 900 artigos (na data de publicação desse artigo). Dificilmente você não encontrará uma solução pronta por aqui, então, pesquisar aqui no blog pode te fazer economizar muito tempo.
A rede foi definida, então resta receber a conexão do ESP32 no laptop. Para isso criei um socket server usando Python. Não importa se você usa Linux, Windows, Mac, BeOS, FreeBSD ou outro sistema. O processo será o mesmo, desde que tenha o Python instalado. O código utilizado no script é esse:
import socket
import subprocess

previous_slide = 4
next_slide     = 5

prev_cmd = 'xdotool click 4'
next_cmd = 'xdotool click 5'

s = socket.socket()

s.bind(('0.0.0.0', 8888 ))
s.listen(0)

while True:
    client, addr = s.accept()

    while True:
        content = client.recv(32)
        if len(content) == 0:
           break
        else:
            print(content)
            if b'n' in content:
                subprocess.call(next_cmd,shell=True)
            elif b'p' in content:
                subprocess.call(prev_cmd,shell=True)

    print("Fim da conexao")
    client.close()
Instale o Python 3 em seu sistema, então execute o script assim:
python3 slide.py
Para Windows certamente tem a extensão .exe depois do nome do programa. Repare no código que estamos esperando um único byte, que pode ser n para next e p para previous. Isso significa que a partir do ESP32 deveremos enviar apenas uma dessas duas letras.
O artigo sobre sockets Python é esse. Falei sobre o módulo subprocess nesse outro artigo.
Controlando o mouse
Mas como mudaremos ded slide? A maneira mais simples é através de um programa que simule o mouse. Repare no código acima que o comando foi montado utilizandoprograma xdotool. Para Windows tem uma montanha de programas para esse propósito. Escolha sua ferramenta nesse link. Instale o programa escolhido e veja quais são os parâmetros que deve utilizar. Deve ser tão simples quanto xdotool click 4. Modifique o comando a ser executado no script Python, caso não esteja usando xdotool.
Dica: Slide na frente do terminal
Para qualquer sistema que utilizar, após executar o programa Python acima, alterne a janela para o slide. A janela da apresentação deve estar em foco. Tendo apenas 1 monitor essa dica pode não fazer sentido, mas se você tiver 2 monitores, essa dica é fundamental.
Código para o ESP32
Esse código foi feito para a T-Wristband da imagem de destaque. Você pode adaptar facilmente para um botão em qualquer ESP32 e mantê-lo na mão como se fosse um controle remoto. Claro que é muito mais prático ter uma pulseira com ESP32, mas infelizmente nem se acha no Brasil para vender.
Criei uma função exclusiva para fazer a comunicação com o socket server. Olha só que implementação simples:
void sendToComputer(String action){
  uint16_t port = 8888;
  String host = "192.168.1.200";
  WiFiClient client;
  client.setTimeout(2);//2s
  if (client.connect(host.c_str(),port,500)){
    client.write(action.c_str());
    client.stop();
  }
  client.stop();
}
Mais detalhes sobre comunicação socket com ESP32 você vê nesse artigo.
Só precisamos definir host, porta, criar um client, conectar e enviar. Básico de tudo e já temos ambos os lados da comunicação. Com isso, você já pode implementar comunicação socket em qualquer projeto!
O código completo na T-Wristband ficou assim:
#include <pcf8563.h>
#include <TFT_eSPI.h> // Graphics and font library for ST7735 driver chip
#include <SPI.h>
#include <Wire.h>
#include <WiFi.h>
#include "sensor.h"
#include "esp_adc_cal.h"
#include "ttgo.h"
#include "charge.h"
#include "credentials.h"

#define TP_PIN_PIN          33
#define I2C_SDA_PIN         21
#define I2C_SCL_PIN         22
#define IMU_INT_PIN         38
#define RTC_INT_PIN         34
#define BATT_ADC_PIN        35
#define VBUS_PIN            36
#define TP_PWR_PIN          25
#define LED_PIN             4
#define CHARGE_PIN          32

extern MPU9250 IMU;

TFT_eSPI tft = TFT_eSPI();  // Invoke library, pins defined in User_Setup.h
PCF8563_Class rtc;

char buff[256];
bool rtcIrq = false;
bool initial = 1;
bool otaStart = false;

uint8_t func_select = 0;
uint8_t omm = 99;
uint8_t xcolon = 0;
uint32_t targetTime = 0;       // for next 1 second timeout
uint32_t colour = 0;
int vref = 1100;

bool doit    = true;
bool pressed = false;
uint32_t pressedTime = 0;
bool charge_indication = false;
unsigned long int pressed_time = 0;
uint8_t count = 0;
uint8_t hh, mm, ss ;

bool turn_off = false;

void sendToComputer(String action){
  uint16_t port = 8888;
  String host = "192.168.1.200";
  WiFiClient client;
  client.setTimeout(2);//2s
  if (client.connect(host.c_str(),port,500)){
    client.write(action.c_str());
    client.stop();
  }
  client.stop();
}

void go_down(){
        tft.setTextColor(TFT_GREEN, TFT_BLACK);
        tft.setTextDatum(MC_DATUM);
        tft.drawString("Press again to wake up",  tft.width() / 2, tft.height() / 2 );
        IMU.setSleepEnabled(true);
        Serial.println("Go to Sleep");
        delay(3000);
        tft.writecommand(ST7735_SLPIN);
        tft.writecommand(ST7735_DISPOFF);
        esp_sleep_enable_ext1_wakeup(GPIO_SEL_33, ESP_EXT1_WAKEUP_ANY_HIGH);
        esp_deep_sleep_start();
}

void touchMonitor(void *pvParameters){
    while (true){
        pressed_time = millis();
        uint8_t tp_state = digitalRead(TP_PIN_PIN);
        doit = tp_state > 0 ? true : false;
        if (doit){
          while (digitalRead(TP_PIN_PIN)){
            vTaskDelay(pdMS_TO_TICKS(10));
          }

          if ((millis()-pressed_time) < 1000){
            Serial.println("MENOR QUE 1s");
          }
          else if ((millis()-pressed_time) > 1000 && (millis()-pressed_time) < 3000) {
            Serial.println("MAIOR QUE 1s");
          }
          else if ((millis()-pressed_time) > 3000){
            go_down();
          }
        }
        vTaskDelay(pdMS_TO_TICKS(10));
    }
}

void shortTouchMonitor(void *pvParameters){
    unsigned long int taps = millis();
    int time_limit = 2000;
    while (true){
      taps = millis()-taps < 0 ? millis() : taps;
      //contador: se houve toque no tempo limite...
      if (digitalRead(TP_PIN_PIN) == HIGH){
        while (digitalRead(TP_PIN_PIN) == HIGH){
          vTaskDelay(pdMS_TO_TICKS(10));
        }
        count = count > 3 ? 0 : count+1;
        taps = millis(); //devolve os 3 segundos para tocar
        vTaskDelay(pdMS_TO_TICKS(200));
        Serial.print("TOQUE: ");
        Serial.println(count);
      }

      //validador: se for 1 e não tiver mais toque e já deu timeout...
      if (count == 1 && (millis()-taps) > time_limit){
        Serial.println("Next");
        count = 0;
        sendToComputer("n");
        //taps = millis();

      }
      //senão, se 2 e não tiver mais toque e já deu timeout...
      else if (count == 2 && (millis()-taps) > time_limit){
        Serial.println("Previous");
        count = 0;
        sendToComputer("p");
        //taps = millis();

      }
      //senão, se 3 e não houver mais toque e deu o tempo limite...
      else if (count == 3 && (millis()-taps) > time_limit){
        count = 0;
        turn_off = true;
        vTaskDelete(NULL);
      }

      vTaskDelay(pdMS_TO_TICKS(50));
    }
    vTaskDelete(NULL);
}

void scanI2Cdevice(void)
{
    uint8_t err, addr;
    int nDevices = 0;
    for (addr = 1; addr < 127; addr++) {
        Wire.beginTransmission(addr);
        err = Wire.endTransmission();
        if (err == 0) {
            Serial.print("I2C device found at address 0x");
            if (addr < 16)
                Serial.print("0");
            Serial.print(addr, HEX);
            Serial.println(" !");
            nDevices++;
        } else if (err == 4) {
            Serial.print("Unknow error at address 0x");
            if (addr < 16)
                Serial.print("0");
            Serial.println(addr, HEX);
        }
    }
    if (nDevices == 0)
        Serial.println("No I2C devices found\n");
    else
        Serial.println("Done\n");
}

void factoryTest()
{
    scanI2Cdevice();
    delay(2000);

    tft.fillScreen(TFT_BLACK);
    tft.drawString("RTC Interrupt self test", 0, 0);

    int yy = 2021, mm = 5, dd = 27, h = 3, m = 15, s = 0;
    rtc.begin(Wire);
    rtc.setDateTime(yy, mm, dd, h, m, s);
    delay(500);
    RTC_Date dt = rtc.getDateTime();

    if (dt.year != yy || dt.month != mm || dt.day != dd || dt.hour != h || dt.minute != m) {
        tft.setTextColor(TFT_RED, TFT_BLACK);
        tft.fillScreen(TFT_BLACK);
        tft.drawString("Write DateTime FAIL", 0, 0);
    } else {
        tft.setTextColor(TFT_GREEN, TFT_BLACK);
        tft.fillScreen(TFT_BLACK);
        tft.drawString("Write DateTime PASS", 0, 0);
    }
}

void setupADC()
{
    esp_adc_cal_characteristics_t adc_chars;
    esp_adc_cal_value_t val_type = esp_adc_cal_characterize((adc_unit_t)ADC_UNIT_1, (adc_atten_t)ADC1_CHANNEL_6, (adc_bits_width_t)ADC_WIDTH_BIT_12, 1100, &adc_chars);
    //Check type of calibration value used to characterize ADC
    if (val_type == ESP_ADC_CAL_VAL_EFUSE_VREF) {
        Serial.printf("eFuse Vref:%u mV", adc_chars.vref);
        vref = adc_chars.vref;
    } else if (val_type == ESP_ADC_CAL_VAL_EFUSE_TP) {
        Serial.printf("Two Point --> coeff_a:%umV coeff_b:%umV\n", adc_chars.coeff_a, adc_chars.coeff_b);
    } else {
        Serial.println("Default Vref: 1100mV");
    }
}

void setupRTC()
{
    rtc.begin(Wire);
    //Check if the RTC clock matches, if not, use compile time
    rtc.check();

    RTC_Date datetime = rtc.getDateTime();
    hh = datetime.hour;
    mm = datetime.minute;
    ss = datetime.second;
}

void setupWiFi(){
    WiFi.begin(SSID,PASSWD);
    for (uint8_t i=0;i<10;i++){
      Serial.print(".");
      delay(200);
      while (WiFi.status() != WL_CONNECTED){
        delay(100);
        Serial.print(".");
      }
      Serial.println(WiFi.localIP());
    }
}

void setup(void)
{
    Serial.begin(115200);

    tft.init();
    tft.setRotation(1);
    tft.setSwapBytes(true);
    tft.pushImage(0, 0,  160, 80, ttgo);

    Wire.begin(I2C_SDA_PIN, I2C_SCL_PIN);
    Wire.setClock(400000);

    //factoryTest(); //após ajustar a hora, comentar essa função

    setupRTC();

    setupMPU9250();

    setupADC();

    setupWiFi();


    tft.fillScreen(TFT_BLACK);

    tft.setTextColor(TFT_YELLOW, TFT_BLACK); // Note: the new fonts do not draw the background colour

    targetTime = millis() + 1000;

    pinMode(TP_PIN_PIN, INPUT);
    //! Must be set to pull-up output mode in order to wake up in deep sleep mode
    pinMode(TP_PWR_PIN, PULLUP);
    digitalWrite(TP_PWR_PIN, HIGH);

    pinMode(LED_PIN, OUTPUT);

    pinMode(CHARGE_PIN, INPUT_PULLUP);
    attachInterrupt(CHARGE_PIN, [] {
        charge_indication = true;
    }, CHANGE);

    if (digitalRead(CHARGE_PIN) == LOW) {
        charge_indication = true;
    }

    xTaskCreatePinnedToCore(touchMonitor,"touchMonitor", 10000, NULL, 1, NULL,0);
    xTaskCreatePinnedToCore(shortTouchMonitor,"shortTtouchMonitor", 10000, NULL, 1, NULL,0);
}

String getVoltage()
{
    uint16_t v = analogRead(BATT_ADC_PIN);
    float battery_voltage = ((float)v / 4095.0) * 2.0 * 3.3 * (vref / 1000.0);
    return String(battery_voltage) + "V";
}

void RTC_Show()
{
    if (targetTime < millis()) {
        RTC_Date datetime = rtc.getDateTime();

        hh = datetime.hour;
        mm = datetime.minute;
        ss = datetime.second;
        // Serial.printf("hh:%d mm:%d ss:%d\n", hh, mm, ss);
        targetTime = millis() + 1000;
        if (ss == 0 || initial) {
            initial = 0;
            tft.setTextColor(TFT_GREEN, TFT_BLACK);
            tft.setCursor (8, 60);
            tft.print(__DATE__); // This uses the standard ADAFruit small font
        }

        tft.setTextColor(TFT_BLUE, TFT_BLACK);
        tft.drawCentreString(getVoltage(), 120, 60, 1); // Next size up font 2


        // Update digital time
        uint8_t xpos = 6;
        uint8_t ypos = 0;
        if (omm != mm) { // Only redraw every minute to minimise flicker
            // Uncomment ONE of the next 2 lines, using the ghost image demonstrates text overlay as time is drawn over it
            tft.setTextColor(0x39C4, TFT_BLACK);  // Leave a 7 segment ghost image, comment out next line!
            //tft.setTextColor(TFT_BLACK, TFT_BLACK); // Set font colour to black to wipe image
            // Font 7 is to show a pseudo 7 segment display.
            // Font 7 only contains characters [space] 0 1 2 3 4 5 6 7 8 9 0 : .
            tft.drawString("88:88", xpos, ypos, 7); // Overwrite the text to clear it
            tft.setTextColor(0xFBE0, TFT_BLACK); // Orange
            omm = mm;

            if (hh < 10) xpos += tft.drawChar('0', xpos, ypos, 7);
            xpos += tft.drawNumber(hh, xpos, ypos, 7);
            xcolon = xpos;
            xpos += tft.drawChar(':', xpos, ypos, 7);
            if (mm < 10) xpos += tft.drawChar('0', xpos, ypos, 7);
            tft.drawNumber(mm, xpos, ypos, 7);
        }

        if (ss % 2) { // Flash the colon
            tft.setTextColor(0x39C4, TFT_BLACK);
            xpos += tft.drawChar(':', xcolon, ypos, 7);
            tft.setTextColor(0xFBE0, TFT_BLACK);
        } else {
            tft.drawChar(':', xcolon, ypos, 7);
        }
    }
}

void IMU_Show()
{
    tft.setTextColor(TFT_GREEN, TFT_BLACK);
    tft.fillScreen(TFT_BLACK);
    tft.setTextDatum(TL_DATUM);
    readMPU9250();
    snprintf(buff, sizeof(buff), "--  ACC  GYR   MAG");
    tft.drawString(buff, 0, 0);
    snprintf(buff, sizeof(buff), "x %.2f  %.2f  %.2f", (int)1000 * IMU.ax, IMU.gx, IMU.mx);
    tft.drawString(buff, 0, 16);
    snprintf(buff, sizeof(buff), "y %.2f  %.2f  %.2f", (int)1000 * IMU.ay, IMU.gy, IMU.my);
    tft.drawString(buff, 0, 32);
    snprintf(buff, sizeof(buff), "z %.2f  %.2f  %.2f", (int)1000 * IMU.az, IMU.gz, IMU.mz);
    tft.drawString(buff, 0, 48);
    delay(200);
}


void loop(){
  //IMU_Show(); //y do acelerometro para left right: <0 left,  >400 right
  if (turn_off){
    turn_off = false;
    go_down();
  }
    if (charge_indication){
        charge_indication = false;
        if (digitalRead(CHARGE_PIN) == LOW){
            tft.pushImage(140, 55, 16, 16, charge);
        }
        else{
            tft.fillRect(140, 55, 16, 16, TFT_BLACK);
        }
    }


    if (digitalRead(TP_PIN_PIN) == HIGH && 3>4){
        if (!pressed){
            initial = 1;
            targetTime = millis() + 1000;
            tft.fillScreen(TFT_BLACK);
            omm = 99;
            func_select = func_select + 1 > 2 ? 0 : func_select + 1;
            digitalWrite(LED_PIN, HIGH);
            delay(100);
            digitalWrite(LED_PIN, LOW);
            pressed = true;
            pressedTime = millis();
        }
        else{
            if (millis() - pressedTime > 3000){
                tft.fillScreen(TFT_BLACK);
                tft.drawString("Not used",  20, tft.height() / 2 );
                delay(3000);
            }
        }
    }
    else{
        pressed = false;
    }

    switch (func_select) {
    case 0:
        RTC_Show();
        break;
    case 1:
        IMU_Show();
        break;
    case 2:
        tft.setTextColor(TFT_GREEN, TFT_BLACK);
        tft.setTextDatum(MC_DATUM);
        tft.drawString("Press again to wake up",  tft.width() / 2, tft.height() / 2 );
        IMU.setSleepEnabled(true);
        Serial.println("Go to Sleep");
        delay(3000);
        tft.writecommand(ST7735_SLPIN);
        tft.writecommand(ST7735_DISPOFF);
        esp_sleep_enable_ext1_wakeup(GPIO_SEL_33, ESP_EXT1_WAKEUP_ANY_HIGH);
        esp_deep_sleep_start();
        break;
    default:
        break;
    }
}
E o funcionamento segue a lógica:
- 1 toque para ligar
- 1 toque para próximo
- 2 toque para anterior
- 3 toques para deep sleep ou:
- 1 toque por 3 segundos para deep sleep
Voltar ao deep sleep após executar o comando é fundamental, senão a bateria não aguenta uma palestra de 1 hora.
Vídeo
Assim que editar o vídeo, estará disponível no canal dobitaobyteBrasil no Youtube. Se não é inscrito inscreva-se e clique no sininho para receber notificações.
Inscreva-se no nosso canal Manual do Maker no YouTube.
Também estamos no Instagram.


Djames Suhanko
Autor do blog "Do bit Ao Byte / Manual do Maker".
Viciado em embarcados desde 2006.
LinuxUser 158.760, desde 1997.